Related Content/Actions are used throughout Oracle’s delivered PeopleSoft applications to show related information and actions that can be taken for a person or transaction. Your organization may have specific requirements for adding additional Related Content or Actions or hiding Related Content or Actions based on specific criteria. As of PeopleTools 8.56, Related Service Filters were deprecated and you must use Security Configuration Authorizations to hide Related Content/Actions. This article
will show you how to do this. Contact us if you need any further assistance with tailoring your delivered PeopleSoft applications to your requirements or creating new PeopleSoft applications.
In this example, we’ll be adding two Application Class Related Actions to a page and then filtering which Actions should show based on some simple logic. The pattern is the same for the other Related Content/Actions service types listed here:
1. Define a Related Content Service – the target for your Related Action
- Navigate to PeopleTools > Portal > Related Content Service > Define Related Content Service
- Click the “Add a New Value” tab
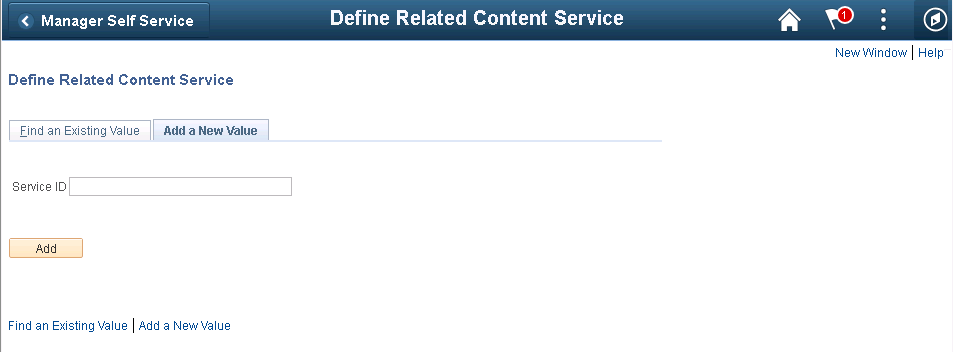
- Enter an ID for the Related Content Service
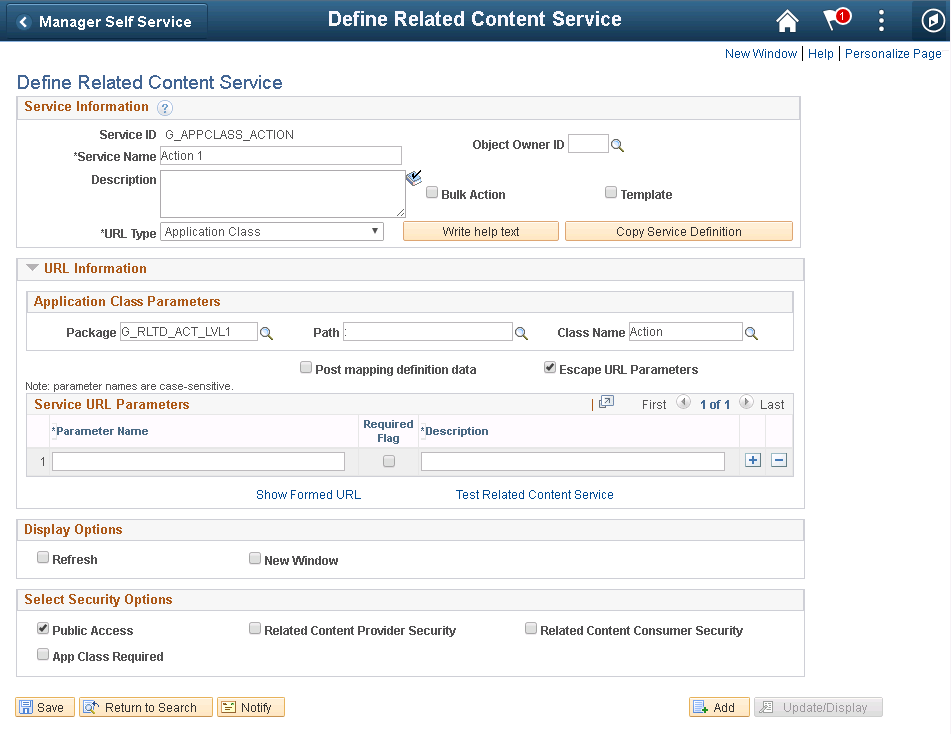
- Enter in the URL Type and related configuration for the Related Action target
 2. Assign Related Action to a page
- Navigate to PeopleTools > Portal > Related Content Service > Manage Related Content Service
- Click on “Assign Related Content to an Application Page”

- Select Content Reference for the component where you want the Action Item to show

- Click on the “Configure Related Actions” tab

- Under “Page Level Related Actions”, enter:
- The page name where you want the related action to show
- Click the magnifying glass under Select and select the Related Content Service created in step 1
- Note: You can click on Find in the grid to find the Related Content Service by it’s name
- A label for the Service
- Click the “Configure” button at the end of the row

- In the Menu Options groupbox, click Select and select the field where you want the related action to show
- Note: The description for the field you selected won’t show up right away. It will show after saving, coming back in, and clicking on the Configure button again.
- In the Menu Options groupbox, click Select and select the field where you want the related action to show
3. Navigate to the page where the Action Item should show
- If the Action Items don’t show, check the following:
- You may have added the Action Item to the wrong field on the page
- Your user may not have page security to the Action Item target (doesn’t apply to App Class targets)
- Verify a domain URL is set in your Web Profile:
- Navigate to Main Menu > PeopleTools > Web Profile > Web Profile Configuration
- Authentication Domain should have a value
- Verify the Domain is active
- Navigate to Main Menu > PeopleTools > Integration Broker > Service Operations Monitor > Administration > Domain Status
- Verify the Integration Gateway is up and accessible
- Navigate to Main Menu > PeopleTools > Integration Broker > Configuration > Gateways
- Verify the URL is correct and the connectors are loaded
- Click Ping Gateway to verify it’s accessible
- Clear cache and restart the web server
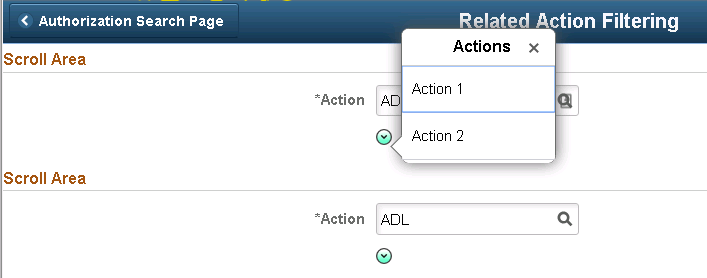
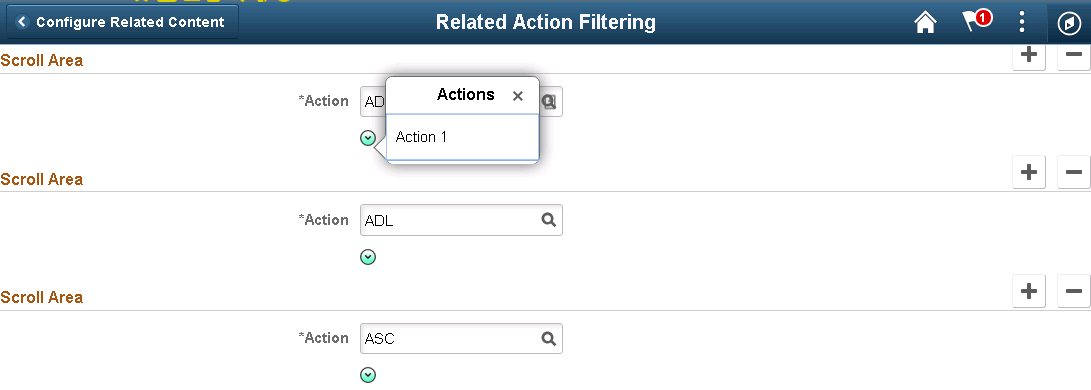
4. For this example, I repeated step 2 to add a second action item

5. To filter which Related Actions should show based on the data in each row, we need to pass parameters from the current row’s data to the Related Action. For this example, we’ll add ACTION, the only field on the row, as a parameter.
- Navigate back to PeopleTools > Portal > Related Content Service > Define Related Content Service
- Add the field(s) to the Service URL Parameter section:

- Navigate back to PeopleTools > Portal > Related Content Service > Manage Related Content Service
- Click on the “Configure Related Actions” tab
- Click the Configure button and specify which page field the parameter should be set from

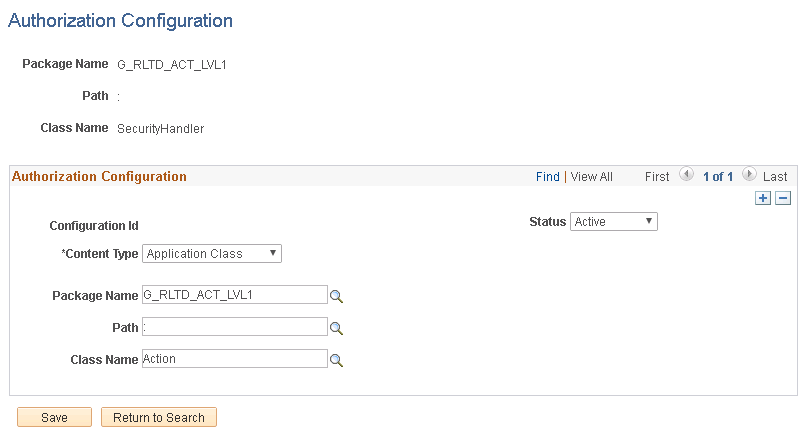
6. To finish the filtering, add a security “Configuration Authorization”
- Create a new Application Class that extends PTCS_SECURITY:Security:SecurityHandler
import PTCS_SECURITY:Security:SecurityHandler;
import PTCS_SECURITY:Security:AuthRequest;
class SecurityHandler extends PTCS_SECURITY:Security:SecurityHandler
method GetAuthorization(&arrAuthReq As array of PTCS_SECURITY:Security:AuthRequest);
end-class;
method GetAuthorization
/+ &arrAuthReq as Array of PTCS_SECURITY:Security:AuthRequest +/
/+ Extends/implements PTCS_SECURITY:Security:SecurityHandler.GetAuthorization +/
If &arrAuthReq [1].GetParameterValue(“ACTION_VAL”) = “ADL” Then
&arrAuthReq [1].Access = “F”;
Else;
&arrAuthReq [1].Access = “T”;
End-If;
end-method;
- Navigate to PeopleTools > Security > Configuration Authorization
- Click “Create new Authorization Configuration”
- Specify the Security Application Class above (6a) and the Related Action target
7. Test filtering on page with Related Actions